讲到芝士蛋糕就一定会想起Secret Recipe。可是每次去帮衬它都觉得这片蛋糕好象很容易做酱,为什么不尝尝自己动手做叻?
既然自己喜欢吃又何乐而不为呢?终于在上个星期下定决心去买材料回家自己动手脚!!
曾经一次尝试自己做,都蛮久以前的事了。那次是有点失败,不过为了雪耻,这次一定要搞到好好睇睇!!
首先,先从网上找了一些Recipe来参考,找下找下越找就越多。每个版本都用不同的材料,每个都不懂使不使得。。。结果就选个最简单。。最少材料的Recipe来试试吧!

一眼望下去,很简单的材料,只有五种!

1。酸奶 250g * 2

2. Digestives 饼干- 15 片

3。乳酪 250g *2

4. 牛油 - 80g

5。蓝莓 - 适量 (我买了两盒)
材料准备好之后,就开始制作啦!!!

Step 1:准备80g的牛油。

Step 2:把牛油放进微波炉煮软 - 大概20-30秒,记得看着它。(时间放太久小心会爆炸!!本姑娘就是犯了这个错误,扭了两分钟,结果牛油在微波炉里炸开来了!害我抹到半死!!)

Step 3:把Digestives饼干压碎碎。。。碎到像粉一样

Step 4: 把煮溶了的牛油加入压到碎碎了的饼干里,混合

Step 5: 混合后,倒入模盘里,再用手背把饼干压整压平

Step 6: 饼干压整齐后,就放进冰箱供冷却。


Step 7: 接下来,就把乳酪切小片以方便混打。

Step 8: 利用手拌机将乳酪拌溶至软绵棉。

Step 9: 乳酪打松后,加入酸奶。

Step 10: 再稍打2分钟至均匀

Step 11: 把蓝莓洗干净

Step 12: 加入适量蓝莓。

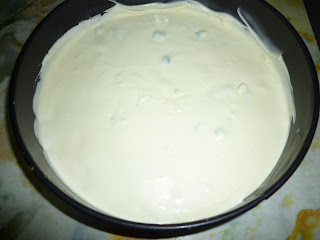
Step 13: 把混合料倒入饼盘中。
Step 14: 把混合料均匀的铺平,放入冰箱至少6个小时就大功告成啦!!(最好是放隔夜)
最后,要准备铺在蛋糕表面的蓝莓汁 (不好意思,忘了拍起来。。呵呵,自己想象一下啦!)
Step 15: 把剩余的蓝莓倒入热锅中,加一点开水。把蓝莓煮到烂开,蓝莓汁溢出来,加入适量的糖(照个人喜欢糖的程度), 再稍微煮滚就行了!
Step 16: 冷藏了隔夜的蛋糕再铺上放冷了的蓝莓汁就可以上桌啦!
.jpg)
Step 17: 开动了!!!
在自己动手的整个过程中,其实都蛮享受下,特别是在无所事事的炎热星期六下午。看着自己精心炮制的蛋糕,每吃一口都会觉得很爽。。。尤其是想象着自己其实在吃着Secret Recipe的蛋糕,味道会更好!!哈哈!


.jpg)


