Recently watch too much of the TVB Movie Buff Championship (超级无敌掌门人)...especially the section 'Lat Lat Sao Si Bin Koh Sik' ...wahh really instigate me craving for sushi again 挑起条寿司根~~~
This time we not finding any new place to makan.....since every time we went to buffet sure will skipped the sushi and go for mainly sashime and others....its is very stomach-filling la...not worthy to consume a lot during buffet. So this round we plan to DIY sushi at home...making fun while learning ..keke
*****
First of all...would like to thanks all my friends and fans for their support and compliment for my Home-Made Sushi *clap *clap *clap.
Now first take a look at my 'Creation' and i'll reveal my so-called 'Secret Recipe' for this successful attempt. keke.......
California Maki
Salmon Sushi and Tamago
Chuka Chimni and Corn Sushi
Tuna Mayo and Tsubukko
Ebi Tempura Maki
Ebi Tempura Maki
Dragon Roll
Dragon Roll
Unagi Maki and Ebi Tempura Maki
Salmon Nishoku
Tadaa....does my sushi looks tempting and make your saliva drooping now? keke
Ok...now heres the sharing~!
A few things to prepare and we'll ready to go..
Ingredients:
~ Sushi Rice
~ Nori Sheet
~ Sushi Seasoning
~ Assorted Food Ingredients
Tools:
~ Bamboo Mat
~ Clingfilm
~ A Very Sharp Knife
Premium Rice @ Rm27.80
Clean and white
no need to rinse can straight away cook it
DIY Sushi Beginner's Pack
Bought at Jusco @ RM28.90
Sushi Seasoning
10 Nori Sheet from the Beginner's Pack
Soy Sauce ~ Ideal for Sushi & Sashimi
Bamboo Mat
Steps 1: Prepare Food Ingredients
Sincerely, this is my first time DIY sushi at home...i was initially not planning to spend a lot for this trial....just in-case i failed..so i targeted to make California Maki only
A quick browse at Jusco for the raw ingredients, Japanese Cucumber, Crab Stick and Avocado....eh eh...there were a lot of ready-made toppings for sushi available also...gets very exciting looking at it.....arghh we just cant stop our-self taking more and more of it into our trolley.....haha ...at the end we had over spent for food as per our initial plan @.@
Crab Stick
Japanese Cucumber
Ripened Avocado
1 avocado cut into thick pieces
another 1 cut into thin slices
my skills not so good...cut into slightly too thick abit..keke
Prawn Fritters
Deep Fried it
drip off the oil
My favourite ~ Unagi @ RM24.90
put the unagi on the grill pan
grilled it in the pre-heat oven
suppose to cut it into quarter but i cut it into halves
haha...home-made one make it more generous la ..keke
Tuna Mayonaise
Flying Fish Roe and Chuka Chimni
Mayonaise
Steps 2: Cook Sushi Rice
i'm using the normal way of cooking it by microwave
soak it with slightly more water at least 30 minutes before cooking
rice 1:3 water
20 minutes in the microwave
nice sushi rice well done by the microwave...keep it cover with lid and let it steam for about 15 minutes.
wait till it slightly cool down then only mixed it with the seasoning
Steps 3: Prepare Sushi Rice Seasoning
There's still a way to prepare the seasoning on our own, if don't have the ready-made seasoning and wanna take the challenge~~
Sushi Seasoning:
~ 3 1/2 Cup Rice Vinegar
~ 3Tablespoon Sugar
~ 1 Teaspoon Salt
Steps 4: Mixed Sushi Rice with Seasoning
Sushi Seasoning from the Beginner's Pack
100ml Sushi Seasoning for 450g Sushi Rice
After the rice steam for 15 minutes, sprinkle the seasoning over the rice and fold it quickly.
Steps 5: Prepare Bamboo Mat, a clean wet cloth, a bowl of clean water
wrap the bamboo mat with clingfilm
for easy rolling and cleaning
a clean wet cloth and a bowl of clean water
Steps 6: Assorted Sushi
Start with something very easy first...keke
Cut the nori sheet into 1 inch width

grab a spoonful of sushi rice into palm and squeeze squeeze and firm it while the rice is still warm
but make sure to wet your palm with some clean water for moisture
else will end up like my hubby palm ...full of rice..keke
firm the sushi rice into ellipse shape and wrap it around with the nori
then filled it up with any toppings such like tuna mayonnaise, chuka chimni, sweet corn
easy job~!
easy easy job~~!
Next: Rolling Sushi ~ California Maki
After the easy easy job...now come the difficult up level sushi~~!!
place a nori sheet on the bamboo mat
slightly wet your hand with the clean water and wipe off just to moisture your palm
take the sushi rice and spread on the nori sheet evenly
dun put too much and thicky rice, make sure still can see thru the nori sheet at bottom
flip over the nori sheet
place the main ingredients for california maki
1 sliced japanese cucumber, 3pieces thick cut of avocado and 2 pieces of crab stick
and squeeze a line of mayonnaise on top of all
then start rolling
roll first half of it
press it hard hard to firm the mixture and sushi rice
then continue to roll it till the end
also press it hard hard to firm the sushi rice
tadaa....done the rolling
now cut it
wet the sharp knife with some water and wiped off with the clean cloth
this is to prevent stickiness of the rice to the knife

as per professionals advise, cut the roll in the above way...haha
i forgot to cut as per advise that makes my sushi cut not in same width..keke
place it nicely on the plate and decorate it with the flying fish roe
see the failure head and tail ... still yummy...keke
Next: Dragon Roll
Do the same as the above steps, place a nori sheet and spread sushi on top of it and flip it over.
Place a cucumber
and place halves of the unagi on top of it
and start rolling roll roll
* see my generous ingredients ...haha
when rolling done
place the 'thin' slices avocado on top of it
and roll it again with the bamboo mat to firm the avocado slice to the sticky sushi rice
cover it with a piece of clingfilm
and cut it with the wet moisture knife
remove the clingfilm when cut work is done
place it nicely on the plate
tadaa my Dragon Roll is done
Next: Ebi Tempura Maki
Again...doing the same to spread sushi rice on the nori sheet and over-flip it.
Place slice of cucumber
2 tempura prawn
and a squeeze of mayonnaise
then start rolling rolling
make sure the prawn tail is out there for visual purposes haha
place the Ebi Tempura Maki nicely on a place
easy and yummy~!
see closely i actually din cut it evenly haha
take the picture in a different angle ..it looks better ya
Inspired to make this Salmon Nishoku from Saisaki buffet
make a cake of sushi rice and wrap it with a salmon fillet
squeeze a touch of mayonnaise and top it with some flying fish roe
the salmon is a bit too thick and soft...its cannot stand still...ops
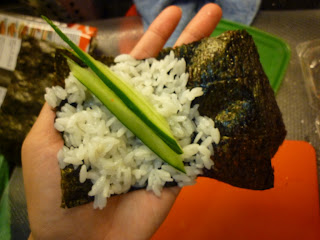
Next: California Temaki
Cut the nori sheet into 3 inches each
spread some sushi rice on the left side only
place the slices cucumber
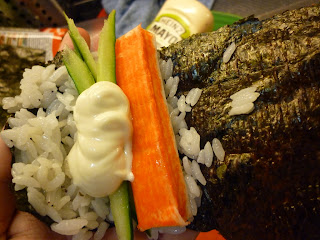
1 crab stick
and a touch of mayonnaise
then start rolling it ...slightly 'senget' the nori and make it looks like a cone
at almost the end of the nori sheet, put 2 sushi rice and roll it till the end
using the sushi rice to stick firmly the nori sheet to prevent it open..keke
then sprinkle some flying fish roe at the top
place it nicely on the plate ~ yum~!
*****
After all the trial and effort... I thought i will failed but unexpectedly its quite easy to DIY sushi at home but yet realize the main challenge is actually on how to make it more presentable.... hmmm...
I believe practice makes perfect....will see when i'm craving for sushi again and i'll try to do it more better than this time.
For all the food ingredients, we had actually spent for about RM100...seems equivalent to have japanese buffet for 2 at any shop. But wait.....we had sushi for 2 days 4 meals.........4 meals leh....even have some extras for my spaghetti
Tempura Prawn with Crab stick salad and Roasted Sesame Dressing
This is a great experience rolling rolling sushi at home...both me and hubby found it very fun and interesting. Especially to thanks his uncle from Sweden whose a Sushi Chef shared his tips on the making to us.
For those who like to cook at home or like japanese sushi, this could be a good experience and yet a very happening activities with kids and family. Happy Trying~!


1 comment:
very detail steps about sushi making. Thanks for ur sharing! i wish i can prepare some sushi and bring it to work for next day lunch bento, but not sure if not keep in fridge for few hours will it spoilt
Post a Comment